
DIY Snow Globe Ideas
Snow globes have a quiet magic that few other decorations can match. Shake one gently, and a tiny world fills with falling snow, turning an ordinary shelf into a winter scene. The good news is that you do not need special skills or expensive supplies to make your own. With a jar, a few miniature figures, some glitter, and a little patience, you can create snow globes that look beautiful, make wonderful gifts, and become keepsakes your family brings out year after year. This guide shares twenty ideas, from classic mason jar globes to photo keepsakes and playful novelty designs, so you can find a project that fits your style, your budget, and your time. Each idea includes practical tips to help your globe stay clear, sealed, and lovely for many winters to come.
Classic Ornament Snow Globes
An ornament snow globe is the easiest way to start, and it looks wonderful hanging on a tree or sitting on a shelf. You begin with a clear, fillable ornament, a tiny deer, and a couple of bottle brush trees, then add a pinch of fake snow and glitter. Because the ornament is small, you do not need much material, and the whole project can be finished in one relaxed afternoon.

Seal the base well so nothing leaks, and use a hot glue gun to fix the figures in place before you close the ornament. A small ribbon at the top finishes the look, and you can make several in different color themes for gifts. Keep the scene simple, because too many figures inside a small globe will look crowded instead of charming.
If you are buying supplies for the first time, start with a kit mindset: one clear ornament, two or three tiny figures, a small bag of fake snow, and a bottle of fine glitter will cover several projects. You can always add more figures later, but a small, well-chosen set keeps the cost down and the results charming.
Mason Jar Snow Globes
Mason jars make some of the prettiest snow globes because the glass is thick, the lid seals tightly, and the shape suits a winter village. Glue a small tree and a red house onto the inside of the lid, fill the jar with water, glycerin, and glitter, then screw the lid on and turn the jar upside down. Set on a wooden base, the finished globe looks like a tiny cabin scene.

Use distilled water so the liquid stays clear for months, and add only a few drops of glycerin so the glitter falls slowly instead of sinking at once. Test the seal over a sink before you gift it, and wipe the glass clean for a crisp view of the scene inside.
Large Jar Winter Villages
A large jar gives you room to build a whole winter village, with a house, several trees, and a deer or two arranged at different depths. Place the tallest tree at the back and the house slightly forward so the scene has depth, then scatter fake snow around the base of the figures. When you shake the jar, the glitter drifts over the entire village like falling snow.

Large jars are heavier when filled, so choose a sturdy shelf and keep them away from the edge. If you want extra sparkle, mix fine and chunky glitter, but keep the total amount small so the scene stays visible. A wide-mouth jar is much easier to decorate than a narrow one.
For a village scene, sketch the layout on paper before you glue anything. Mark where the house, the trees, and any path will sit, and check the arrangement through the glass from every angle. A few minutes of planning prevents the common problem of a beautiful figure hidden behind a taller one.
Waterless Snow Globes
Waterless snow globes are perfect if you worry about leaks, because nothing inside them can spill. You simply arrange figures such as a polar bear and small trees inside a dry jar, add a layer of fake snow at the bottom, and close the lid. They are safe for children’s rooms, easy to mail, and they never go cloudy the way a water-filled globe sometimes can.

To make a waterless globe look magical, use a jar with very clear glass and place it where light can catch the fake snow. You can also add a battery fairy light around the base for a warm glow in the evening. Because there is no liquid, you can swap the scene each season without any mess.
Glitter Snow Globes
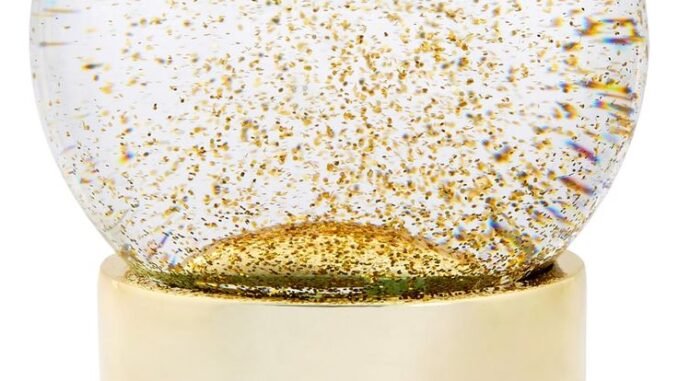
A glitter snow globe is all about the swirl, so choose glitter that matches your decor and let it take center stage. Gold glitter looks elegant against a white background and works beautifully in a living room, while silver or iridescent glitter feels more like a frosty winter day. The key is balance: enough glitter to create a snowfall effect, but not so much that it hides the figure inside.

Shake the globe gently and watch how the glitter settles, then adjust the amount if it falls too fast or too slowly. A tiny drop of glycerin in the water slows the fall and makes the swirl last longer. Keep the globe out of direct sunlight so the water stays clear and the glitter keeps its shine.
Different glitters behave differently in water, so test a pinch in a glass of water before you commit. Fine glitter floats and swirls the longest, chunky glitter falls faster and sparkles more, and mixing the two gives you both movement and shine in a single globe.
Lighted Jar Snow Globes
Adding light to a jar snow globe turns it into a cozy night light as well as a decoration. Place a small battery light under the jar or wrap a short string of warm fairy lights around the base, and the wooden trees and snow inside will glow softly. This style looks especially lovely on a mantel or bedside table on dark winter evenings.

Always use battery lights rather than mains lights inside or near a water-filled jar, and keep the battery pack outside the jar where you can reach it. Change the batteries before the festive season so the globe is ready to shine, and store spare batteries with your holiday decorations for next year.
A Pair of Jar Globes
Making snow globes in pairs is a lovely idea, because two globes side by side look more finished than one alone. Try one globe with a simple tree and another with a cheerful snowman, using the same jars and the same style of base so they clearly belong together. They make a sweet gift set, and they also look great at either end of a mantel.

Keep the glitter color the same in both jars for a coordinated look, or use complementary colors such as silver and gold. Label the bottom of each jar with the year you made them, so the set becomes a keepsake you can add to over time.
When you make a pair, photograph the first globe before you start the second so you can match the height of the figures and the amount of snow. Small differences are fine, but matching the overall look makes the pair feel like a set rather than two unrelated projects.
Step by Step Snow Globe Making
If you have never made a snow globe before, follow a simple step-by-step method and you cannot go far wrong. First, choose your jar and figures and test how they fit. Next, glue the figures to the lid and let the glue dry completely. Then fill the jar with water and glitter, seal it, and turn it over to reveal your scene.

The most common mistake is rushing the glue, which can come loose in the water and spoil the scene. Give the glue a full day to cure if you can, and test the globe over a bowl before you display it. Once you have made one successful globe, the next ones will feel easy and fun.
Woodland Friends Snow Globes
A woodland friends globe brings a storybook feeling to your shelf, with a bear, a rabbit, a little house, and a tree all sharing one snowy scene. Arrange the animals so they seem to be looking at each other or at the house, which makes the scene feel alive rather than random. Small figures work best, because large ones can block the view of the rest of the scene.

This is a wonderful project to make with children, who can choose which animals go inside and help sprinkle the snow. Use unbreakable plastic jars for younger makers, and let an adult handle the glue gun. The finished globe becomes a favorite decoration that children will want to shake again and again.
Keep a small notebook of what works, noting the jar size, the glue you used, and how much glitter gave the best snowfall. Next year, you will not have to guess, and you can repeat your favorite recipe with confidence or improve it slightly.
Photo Snow Globes for Babies
A photo snow globe turns a favorite baby photo into a keepsake that family members will treasure. Print the photo on waterproof paper or laminate a small copy, then place it inside a clear globe with a little fake snow at the base. When the globe is shaken, the snow drifts around the photo like a gentle winter scene.

Choose a photo with a clear, close-up face so it stays easy to see through the glass and glitter. Keep the glitter fine and light so it does not cover the photo, and use a sturdy base that stands safely on a shelf. These globes make thoughtful gifts for grandparents and new parents alike.
Photo Snow Globes for Children
A photo of a child in winter clothes is a natural fit for a snow globe, because the snowy scene inside matches the outfit in the picture. Cut the photo into a simple shape, seal the edges, and mount it on a small base inside the globe with a tree or two beside it. The result feels personal in a way that a shop-bought decoration never can.

Make one for each child in the family so everyone has their own globe to display, and write the year on the base. If you make them every winter, the collection will show how quickly the children grow, and it will become a much-loved family tradition.
For photo globes, print two copies of the photo and keep one spare in case the first gets damp during assembly. Dry your hands and your tools before handling the print, and seal the photo completely so water cannot reach the edges.
Santa’s Workshop Snow Globes
A red truck carrying a tree, parked beside a little workshop, makes a snow globe that feels full of Christmas spirit. Add a small sign, some trees, and a string of lights, and the scene looks like a tiny delivery depot getting ready for the holidays. A waterless version is easiest here, because you can add lights and signs without worrying about water damage.

Look for miniature trucks and trees in craft stores, and test the sizes together before you glue anything down. The truck should be the star of the scene, so keep the other figures smaller and place them slightly behind it. This globe looks wonderful on a porch table or beside the front door.
Travel Souvenir Snow Globes
Souvenir snow globes are classic travel keepsakes, and you can make your own version inspired by a favorite trip. A miniature landmark, such as an arch or tower, placed inside a globe with a little snow, instantly brings back memories of a city you visited. Add the city name to the base if you like, and the globe becomes a small monument to your travels.

If you collect souvenir globes, display them together on one shelf so they tell the story of your journeys. You can also make a globe for a trip you dream of taking, as a fun way to save and plan. Either way, a travel globe is a decoration with a story behind it.
A workshop scene benefits from tiny details: a miniature wreath on the door, a stack of small parcels, or a dusting of snow on the roof. Add only one or two details, though, because a crowded scene is harder to read through glitter and glass.
Novelty Flamingo Snow Globes
Not every snow globe has to be traditional, and a pink flamingo globe is proof that a little humor belongs in holiday decorating. The bright pink bird stands out against white snow and glitter, and it makes people smile the moment they see it. Novelty globes are great for tropical-themed parties, summer birthdays, or anyone who likes their decor with a twist.

Pair a flamingo globe with other bright decorations, or let it stand alone as a conversation piece on a desk. Use pink or iridescent glitter to match the bird, and keep the base simple so the flamingo stays the focus. It is a reminder that handmade decorating should be fun first.
Nativity Snow Globes
A nativity snow globe is a gentle, meaningful decoration for the Christmas season, with the holy family sheltered inside a clear dome on a gold base. Because the scene is sacred to many families, keep the design calm and simple, with soft white or gold glitter falling slowly around the figures. Place it where it can be seen and appreciated, such as a living room side table.

Choose a dome with a wide base so the figures sit securely, and handle the globe carefully because nativity figures can be delicate. This style also makes a thoughtful gift for someone who values traditional Christmas decorations, and it suits homes of every style.
Nativity globes deserve a calm display spot away from busy shelves. A plain cloth underneath, a single candle nearby, and a little space around the dome all help the scene feel special rather than lost among other decorations.
Elegant Gold Snow Globes
For an elegant look, choose a gold glitter globe and pair it with candles and stockings in warm, neutral tones. The gold sparkle catches candlelight beautifully in the evening, and the globe becomes part of a sophisticated holiday display rather than a playful one. Keep the surrounding decorations simple so the globe can shine.

Gold globes work well in living rooms and entryways, where guests will notice them as soon as they arrive. If you have several gold decorations, group them together for a rich, coordinated effect, and add a few sprigs of greenery for a natural contrast.
Snow Globes in Real Snow
Photographing a snow globe outdoors in real snow makes for a magical picture, and it is also a fun way to enjoy your creation. Set the globe on a snowy surface, step back, and let the real winter landscape blur behind the tiny scene inside the glass. The contrast between the small world in the globe and the big world outside is what makes the photo special.

If you try this, use a waterless globe or keep a water-filled globe upright and dry on the outside, and bring it back inside before it gets too cold. Take the photo quickly, then enjoy the globe indoors where it belongs. It is a lovely way to share your handmade project with friends online.
When you photograph a globe outdoors, wipe the glass first and shoot in soft daylight rather than harsh sun. Glare on curved glass can hide the scene inside, so try a few angles until the tiny world is sharp and bright.
Monogram Snow Globe Ornaments
A monogram snow globe ornament is a personal gift that anyone can appreciate, because the letter on the front stands for the recipient. Fill a small clear ornament with fake snow and a tiny tree, then add a letter charm or a painted initial to the outside. The result is simple, elegant, and unmistakably made for one person.

Make a full set of initials for a family, one ornament per person, and hang them together on the tree. Use the same style of letter and the same snow for every ornament so the set looks intentional. These ornaments are light, easy to store, and lovely to bring out year after year.
Mini Tree Ornament Globes
Sometimes the simplest snow globe is the best, and a mini jar with just two small trees proves the point. There is no complicated scene to arrange, no figures to balance, and the snowy trees speak for themselves. Hang the jar from the tree with a ribbon, or set a row of them along a windowsill for a woodland effect.

These mini globes are quick to make in batches, so they are ideal for party favors, classroom crafts, or small gifts for neighbors. Vary the tree colors slightly, green and frosted white, for a natural forest look, and keep the jars small so they hang well.
Mini jar ornaments are also wonderful for advent calendars or party tables. Tie a small tag to each ribbon with the recipient’s name, and the ornament doubles as both a decoration and a place card at a festive dinner.
Ballerina Snow Globes
A ballerina snow globe feels like a music box frozen in time, with a tiny dancer twirling inside a swirl of blue and pink glitter. It is a classic gift for young dancers, and it also suits a bedroom shelf or a dressing table. Choose a ballerina figure with a stable base, and use fine glitter so the dancer stays clearly visible as the snow falls.

Pair the globe with soft colors in the room, such as pale pink bedding or a white dresser, so the dancer stands out. If you are giving it as a gift, add a small card explaining why you chose it, because a personal note turns a pretty object into a keepsake.
Whichever idea you choose, start with one globe and enjoy the process. Test your seal, let the glue dry fully, and shake your finished globe somewhere you can admire it. Before long, you will have a small collection of snowy worlds, each one made by hand and full of memories, ready to brighten every winter.
Leave a Reply