
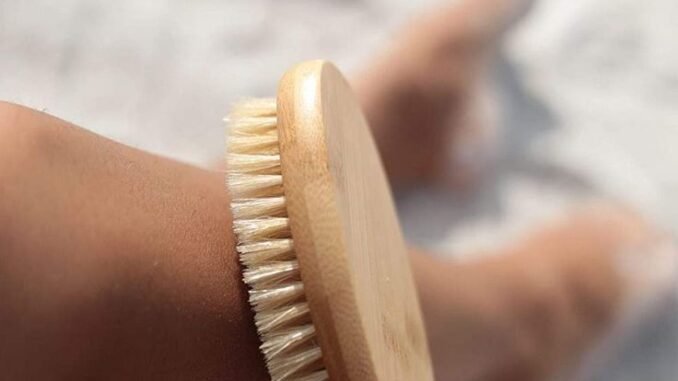
Dry brushing has quietly become one of the most talked-about rituals in natural skincare, and for good reason. The practice is beautifully simple: before you step into the shower, you sweep a natural-bristle brush over dry skin in long, deliberate strokes, always working toward the heart. It takes five minutes, costs almost nothing after the initial brush purchase, and devotees swear it leaves skin softer, smoother, and glowing. But what is dry brushing really doing beneath the surface? Is it just exfoliation with extra steps, or does it genuinely support circulation and lymphatic flow? This complete guide walks you through everything you need to know — the benefits, the technique, the tools, the mistakes to avoid, and how to build a dry brushing routine that actually sticks.
What Is Dry Brushing, Really?
At its core, dry brushing is a form of manual exfoliation performed on dry, unmoistened skin. Unlike scrubs or chemical exfoliants that rely on granules or acids to dissolve dead cells, dry brushing uses the mechanical friction of stiff natural bristles to sweep away the dull, flaky layer that accumulates on the skin’s surface. The “dry” part matters: wet skin softens and swells, which makes brushing less effective at lifting dead cells and more likely to drag or irritate. On dry skin, the bristles glide and flick, stimulating the surface without soaking it first.

The routine typically takes three to five minutes and is done before showering, so any loosened dead skin rinses away immediately. Most practitioners brush in the morning, when the stimulating, circulation-boosting effect doubles as a wake-up ritual.
The Surprising History Behind the Ritual
Dry brushing is far from a new invention. Ayurvedic medicine, the ancient Indian healing system, has included a practice called garshana for thousands of years — traditionally performed with raw silk or wool gloves rather than a brush, using the same upward, heart-directed strokes to stimulate the skin and lymph. Ancient Greek and Roman athletes reportedly scraped and brushed their skin before bathing, and traditional Chinese medicine has long incorporated dry skin brushing to move stagnant energy and support circulation.

The modern version gained traction through Finnish sauna culture and later through naturopathic practitioners who recommended it as a gentle detox support. What is old is new again: today’s wellness movement has simply repackaged this ancient ritual with prettier brushes and better marketing.
How Dry Brushing Actually Benefits Your Skin
The most immediate and undeniable benefit of dry brushing is exfoliation. Your skin sheds roughly 30,000 to 40,000 dead cells every minute, and many of them linger on the surface, dulling your glow and clogging pores. The bristles physically dislodge this buildup, revealing the fresher skin underneath. The result is skin that looks brighter and feels noticeably smoother to the touch — often after a single session.

Exfoliation also improves how well your skincare products absorb. Moisturizers, body oils, and serums penetrate more evenly when they are not sitting on top of a layer of dead cells. Many people notice that ingrown hairs become less frequent too, since regular brushing keeps hair follicles clear.
Lymphatic Drainage: What Science Says
One of the most repeated claims about dry brushing is that it stimulates the lymphatic system — the network of vessels that carries lymph fluid, immune cells, and waste products through the body. Unlike the circulatory system, the lymphatic system has no central pump; it relies on muscle movement, breathing, and external pressure to keep fluid moving. Gentle, directional brushing toward the heart is thought to encourage this flow, which is why practitioners emphasize stroke direction so strongly.

It is worth being honest here: large-scale clinical trials specifically on dry brushing and lymphatic drainage are scarce. Dermatologists generally agree the practice is safe for healthy skin and that any boost to circulation is real, even if the dramatic “detox” language in marketing oversells the evidence. Treat lymphatic claims as a possible bonus, not the main event.
Can Dry Brushing Reduce Cellulite?
Cellulite is the question everyone asks, so let us address it directly. Cellulite forms when fat deposits push through the connective tissue beneath the skin, creating a dimpled appearance that affects the vast majority of women and many men regardless of weight or fitness. No topical ritual — dry brushing included — can permanently restructure that connective tissue or remove the fat beneath it. Anyone promising otherwise is selling something.

That said, dry brushing can temporarily improve the appearance of cellulite-prone areas. By exfoliating and boosting surface circulation, the skin looks plumper, smoother, and more even-toned for a period after brushing — which softens the look of dimpling. Think of it as excellent cosmetic maintenance rather than a cure.
Choosing the Right Dry Brush for Your Skin Type
Not all dry brushes are created equal, and the right choice depends largely on your skin’s sensitivity. If your skin is normal to resilient, a brush with firm natural bristles — typically cactus, sisal, or tampico fibers — will do the job well. These plant-based bristles are stiff enough to exfoliate effectively but flexible enough to bend with the body’s contours. If your skin is sensitive, fair, or easily reddened, look for a softer brush labeled for sensitive skin, or one with a blend of softer fibers.

Handle design matters too. A long-handled brush reaches your back and the backs of your legs without acrobatics, while a palm-sized brush or strap brush gives you more control over pressure on arms and torso. Many people end up owning two: a long handle for hard-to-reach areas and a smaller one for detail work. Whichever you choose, make sure the bristles are securely anchored — shedding bristles mid-routine is a sign of poor quality, and loose fibers can scratch.
Natural vs. Synthetic Bristles: Which Is Better?
Traditionalists insist on natural bristles, and there are practical reasons beyond tradition. Plant fibers like sisal and tampico have a slightly irregular texture that exfoliates effectively without feeling plasticky, and they tend to soften gradually with use, conforming to your pressure over time. They are also biodegradable, which matters if you replace your brush every six to twelve months as recommended.

Synthetic bristles, usually nylon, have their own advantages: they dry faster, resist mildew, and are a good option for vegans or anyone with plant-fiber allergies. The downside is that cheap synthetics can feel scratchy and may not soften with use the way natural fibers do. If you go synthetic, choose a reputable brand with rounded, polished bristle tips. Either way, avoid anything that feels like a wire brush — pain is never the goal, and broken capillaries from overly aggressive bristles take weeks to fade.
The Ideal Time to Dry Brush: Morning or Night?
Most dry brushing devotees brush in the morning, and there is solid reasoning behind it. The ritual is stimulating: it increases surface blood flow, wakes up nerve endings, and leaves you feeling alert and energized — a natural complement to a morning shower. Many people describe the post-brushing tingle as better than a second cup of coffee, and building it into a morning routine makes consistency easier since it happens before the day’s chaos begins.

That said, there is no rule against evening brushing. If mornings are rushed, a pre-shower evening session still delivers the exfoliation and skincare-absorption benefits, and some people find the rhythmic strokes genuinely relaxing — a way to transition out of the day. The only timing rule that truly matters is brushing before you shower, never after, because the shower rinses away loosened dead skin and the warm water preps your skin to drink up moisturizer. Pick the time you will actually stick with; consistency beats perfect timing every time.
Step-by-Step: The Classic Dry Brushing Routine
Here is the foundational routine that most practitioners follow. Start with completely dry skin — no lotions, no dampness — ideally right before your shower. Begin at your feet and work upward in long, smooth strokes, always brushing toward the heart. Use light to medium pressure: the skin should flush pink, never sting or turn red and angry. Overlap your strokes slightly so you cover every area, and spend a little extra time on rough spots like heels, knees, and elbows.

The full sequence takes about five minutes: feet and legs, then hands and arms, then torso and back, finishing with the abdomen brushed in gentle clockwise circles to follow the direction of digestion. Shower afterward with your normal cleanser, then moisturize generously while skin is still slightly damp — this is when absorption is at its peak. That is the entire ritual. Simple, repeatable, and easy to refine as you learn how your skin responds.
The Correct Brushing Direction for Each Body Part
Direction is the detail that separates an effective routine from random scrubbing. The guiding principle is simple: always brush toward the heart, following the natural flow of venous blood and lymph back toward the center of the body. On your legs, that means upward strokes from ankle to thigh. On your arms, upward strokes from wrist to shoulder. On your back, strokes move from the lower back upward and from the outer back inward toward the spine, then up.

The abdomen is the one exception to the straight-line rule: use gentle clockwise circular motions around the navel, which follows the path of the colon and feels more comfortable on softer tissue. On the chest and neck, use very light upward strokes and skip the delicate skin directly over the throat. Joints like knees and elbows can handle small circular motions to work the bristles into creases. Once this directional map becomes muscle memory, the routine flows in one smooth, meditative sequence.
How Much Pressure Should You Use?
Pressure is where most beginners go wrong, usually by pressing far too hard. The correct pressure is best described as firm but comfortable — enough that you feel the bristles engaging the skin, not so much that you wince. A good benchmark: your skin should look lightly flushed and pink afterward, like a healthy glow, never scratched, streaked, or sore. If your skin stays red for more than a few minutes or feels raw in the shower, you pressed too hard.

Let the brush do the work rather than bearing down with your arm. Bony areas like shins, collarbones, and the tops of feet need an especially light touch, while fleshier areas like thighs and buttocks can handle slightly more pressure. Over your first two weeks, start lighter than you think necessary and increase gradually as your skin adapts. Remember that dry brushing is a daily or near-daily ritual — the cumulative effect of gentle, consistent sessions far outweighs one aggressive scrubbing.
Dry Brushing Your Legs and Thighs
Legs are where most people begin, partly because the technique is intuitive and partly because legs show results quickly. Start at the top of the foot and brush upward over the ankle in long strokes, continuing up the shin and calf toward the knee. Spend a few extra passes on the shins, where skin tends to be dry and flaky, especially in winter. Behind the knee, switch to lighter, shorter strokes since the skin there is thinner and more sensitive.

For thighs, continue the upward motion toward the hip, using slightly broader strokes on the front and outer thigh and gentler pressure on the inner thigh. Many people concentrate on the thighs hoping to address cellulite — as discussed, the benefit here is improved texture and tone appearance rather than structural change, but the smoothing effect is genuinely noticeable. Finish the legs with a few upward sweeps over the buttocks. Because legs represent a large surface area, give them the most time in your routine — roughly two of your five minutes.
Dry Brushing Your Arms, Chest, and Back
Move to the arms next, starting at the back of the hand and brushing up the forearm toward the elbow, then from elbow to shoulder. The underarm area deserves attention since it houses clusters of lymph nodes — use light, short strokes directing toward the armpit rather than pressing into it. The backs of the arms, where many people develop rough, bumpy texture known as keratosis pilaris, respond particularly well to consistent brushing.

For the chest, use feather-light upward strokes and avoid the nipple area entirely. The neck gets only the gentlest upward sweeps, and many practitioners skip it altogether in favor of a dedicated facial routine. Your back is the trickiest area — this is where a long-handled brush earns its keep. Brush from the lower back upward, and from the sides inward toward the spine. If you cannot comfortably reach your full back, that is fine; focus on what you can reach rather than contorting. The torso front gets light strokes moving upward toward the heart.
What About Your Face? (Facial Dry Brushing)
Facial skin is dramatically thinner and more reactive than body skin, so never use your body brush on your face — the bristles that feel invigorating on your thighs will be far too harsh for your cheeks. Facial dry brushing is its own practice, done with a much smaller, softer brush specifically designed for the face, with bristles closer to a soft toothbrush in feel than a body brush.

The technique is gentler too: light upward and outward strokes, avoiding the delicate eye area entirely, for no more than a minute or two, once or twice a week at most. Done correctly, it can give the complexion a fresh, dewy look by lifting dull surface cells. Done aggressively, it causes redness, sensitivity, and broken capillaries that linger. If you have rosacea, active acne, eczema, or any inflammatory skin condition on your face, skip facial dry brushing entirely and discuss exfoliation options with a dermatologist instead.
Common Mistakes Beginners Make
The most frequent beginner error is treating dry brushing like scrubbing a floor — bearing down hard, brushing back and forth, and chasing a “deep clean” feeling. Dry brushing is directional and rhythmic, not vigorous. A related mistake is brushing too often at the start: enthusiastic beginners sometimes brush twice a day, irritating skin that needs time to adapt. Start with two to three sessions per week and build up.

Other common missteps include brushing wet or lotioned skin (which defeats the purpose), sharing a brush with someone else (hygiene matters — this is a personal tool), never cleaning the brush, and brushing over irritated, sunburned, or broken skin. Perhaps the subtlest mistake is expecting overnight transformation. Dry brushing is a compounding habit: the glow builds over weeks of consistency, not from a single heroic session. Patience is part of the technique.
How Often Should You Dry Brush?
For most people with normal skin, three to five times per week is the sweet spot — frequent enough to maintain smooth, exfoliated skin without overdoing it. Daily brushing is fine once your skin has adapted, and many long-term devotees do brush every morning as part of their ritual. The key word is adapted: skin that is new to the practice needs a ramp-up period of lighter, less frequent sessions.

If your skin is sensitive, dry, or prone to irritation, two to three times per week may be your permanent cadence, and that is perfectly effective. Pay attention to feedback: comfortable pink flush that fades quickly means you are in the right zone; lingering redness, stinging in the shower, or new sensitivity means you should scale back frequency, pressure, or both. Seasonal adjustments help too — many people brush less often in harsh winter months when skin is already stressed, and more in summer when they want limbs looking their smoothest.
What to Do After Dry Brushing: Shower and Moisturize
The post-brushing shower is not optional — it rinses away the dead skin cells you just loosened, along with any bristle dust. Keep the water warm rather than hot, since hot water strips the natural oils that your freshly exfoliated skin needs. Use a gentle, non-stripping cleanser rather than a harsh soap, and there is no need to scrub again; the brushing already did the exfoliation work.

The real magic happens in the three minutes after you towel off. Freshly brushed skin absorbs moisturizer far more readily, so apply body oil, lotion, or cream while skin is still slightly damp to lock in hydration. This is the step that transforms dry brushing from a nice exfoliation trick into a genuinely transformative skincare routine — the combination of cleared pores plus deep moisture is what produces that coveted lit-from-within glow. Skip the moisturizer and you may find brushed skin feels drier than before, which misses the point entirely.
Best Oils and Lotions to Pair With Dry Brushing
Because dry brushing increases product absorption, what you apply afterward matters more than usual. Body oils are the classic pairing: jojoba, sweet almond, and squalane absorb quickly without greasiness, while coconut oil works for those who do not mind a richer feel (though it can clog pores for some). Look for oils with minimal fragrance if your skin is sensitive, since freshly exfoliated skin can react to heavy perfumes.

If you prefer lotions or creams, choose formulas with humectants like glycerin or hyaluronic acid plus an occlusive element such as shea butter to seal moisture in. In winter, layering works beautifully — a hydrating serum or light oil first, then a richer cream on top. Whatever you choose, this is also the ideal moment for targeted treatments: a firming cream on thighs or a brightening lotion on arms will penetrate better on brushed skin than at any other time of day.
Who Should Skip Dry Brushing? (Safety and Contraindications)
Dry brushing is gentle for healthy skin, but it is not for everyone. Skip it — or check with a dermatologist first — if you have eczema, psoriasis, rosacea, or any active inflammatory skin condition, since mechanical friction can trigger flare-ups. Never brush over sunburn, open cuts, scrapes, rashes, moles that have changed, or areas with active infections like cellulitis. People with very thin, fragile skin, including many older adults and those on blood thinners or long-term steroids, should be especially cautious.

Varicose veins deserve a specific mention: do not brush directly over them, as pressure on compromised veins can cause damage — brush around them lightly or skip those areas. If you are pregnant, dry brushing is generally considered safe on the body with light pressure, but avoid the abdomen and check with your healthcare provider. When in doubt, the rule is simple: irritated, broken, or compromised skin never gets brushed, and any persistent adverse reaction means stopping and consulting a professional.
Building a 30-Day Dry Brushing Habit That Sticks
The difference between people who love dry brushing and people who tried it twice is habit design, not willpower. Start by anchoring the ritual to something you already do: keep the brush in the shower caddy or on the bathroom counter where you will see it before your morning shower, not hidden in a drawer. Commit to just two weeks at three sessions per week — a low enough bar that skipping never feels like failure.

Track your sessions on a simple calendar or habit app; the visual streak is surprisingly motivating. After two weeks, assess: is your skin smoother? Are your legs less ashy? Most people notice enough improvement by day fourteen that continuing feels like a reward rather than a chore. At thirty days, the routine usually runs on autopilot — five quiet minutes that belong to you before the day begins. Replace your brush every six to twelve months, clean it weekly with gentle soap and thorough air-drying, and enjoy one of the simplest, most satisfying rituals in all of skincare.
Leave a Reply